
Use the Report Options page to set up your reports before running them. Report options vary from report to report, but in general, you will be able to:
- Control how variable values are subtotaled in your completed reports.
- Better define the data that will be included in your completed report.
- Narrow the focus of your report to data from a specific timespan.
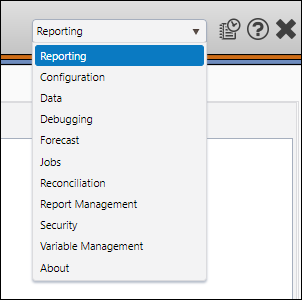
- Select Reporting from the Navigation Toolbar.
- Click on the Report tab, and then the Report Options page.
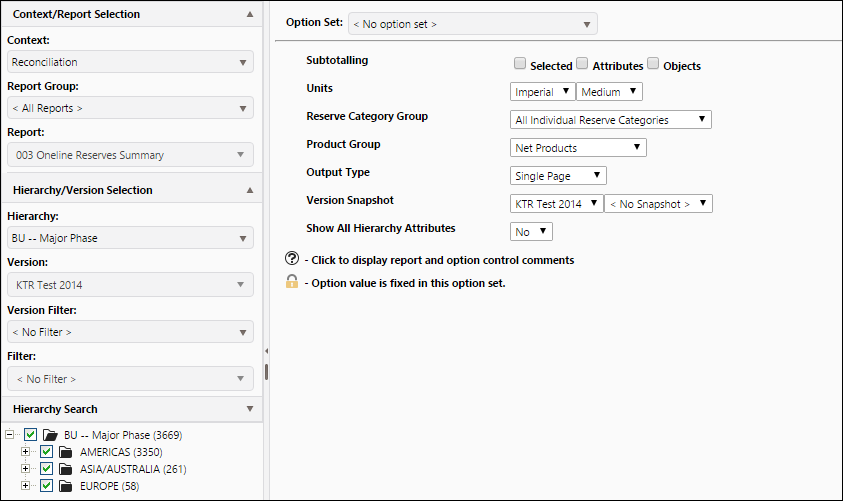
When running a report, review your report's options prior to launching it. This will prevent you from running CPU-intensive reports on too broad a scope of data, and ensure you target the data you actually want to include in your report. An example set of report options is visible below. When you access the report options page, review each option prior to launching your report.
Click image to expand or minimize.
If you switch between reports with matching report options, report options that are shared between the reports will automatically use the same values (e.g. if a subsequent report also included the Reserve Category Group report option, All Individual Reserve Categories would automatically be selected when the report was selected). This way, you can run a series of reports on similar data, without modifying report options for each one.
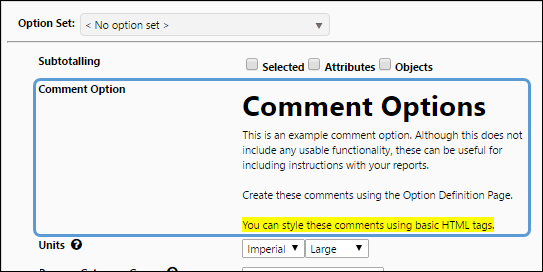
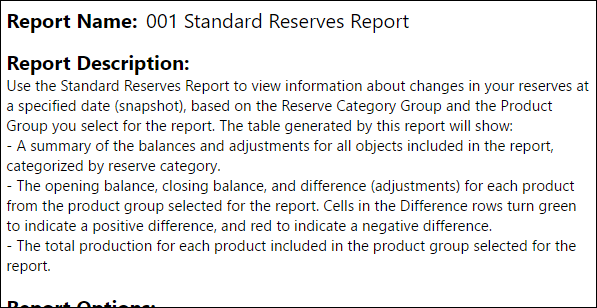
There are three different types of comments that can be viewed on the Report Options page. There are three different types of comments that can be viewed on the Report Options page:
- Tooltip Option Comments: Comments can be added to each type of report option in your Reserves instance. These comments won't be immediately visible when you access the Report Options page, but tooltips will be added to the page to identify where these comments can be viewed. Hover your cursor over the tooltip icon (
 ) to view it.
 - Comment Report Options: Comment report options can also be set up. These comments will be visible as soon as you open any report that the option has been assigned to.
- Report Comments: Each report can have its own comments as well. To view a report's comments, you will need to open the Option Settings popup. To open this popup, click on any of the comment icons (), or the white comment icon (
 ) below the report's options.

Click image to expand or minimize.
Click image to expand or minimize.
Use option sets to quickly apply a predefined list of report options to the Report Options page. To enable an option set, follow these steps.
- Select the option set you wish to apply to your report using the Option Set drop-down menu. All of the report options that are defined in your option set will be locked.
- Any report options that are not defined in your option set will be available for editing. Set up your remaining report options, and then run your report.
Once you have set your report options, you can launch your report from the Report Options page. Use the hierarchy to select the objects to include in your report, and then click on the appropriate level of the hierarchy to initialize your report. More information on initializing reports can be found on The Report Page. When a report is launched from the Report Options page, the Report page will open automatically.
If you find yourself running a report with a specific option configuration (or running a group of reports with similar report options) on a consistent basis, you might consider creating an option set. Creating an option set will allow you to quickly set report options without having to modify each one individually. For more information see The Option Sets Page.
Users with permissions to access and use the Report Management part of Reserves can set up report comments.
- Tooltip Comments can be set up using The Option Definition Page.
- Comment Report Options can be set up using The Option Definition Page. Once they have been set up, assign them to your reports using The Report Manager Page.
- Report Comments can be set up using The Report Manager Page.
The Report Options Page
Use the Report Options page to set up your reports before running them. Report options vary from report to report, but in general, you will be able to:
- Control how variable values are subtotaled in your completed reports.
- Better define the data that will be included in your completed report.
- Narrow the focus of your report to data from a specific timespan.
- Select Reporting from the Navigation Toolbar.
- Click on the Report tab, and then the Report Options page.
Set up Report Options
When running a report, review your report's options prior to launching it. This will prevent you from running CPU-intensive reports on too broad a scope of data, and ensure you target the data you actually want to include in your report. An example set of report options is visible below. When you access the report options page, review each option prior to launching your report.
Click image to expand or minimize.
If you switch between reports with matching report options, report options that are shared between the reports will automatically use the same values (e.g. if a subsequent report also included the Reserve Category Group report option, All Individual Reserve Categories would automatically be selected when the report was selected). This way, you can run a series of reports on similar data, without modifying report options for each one.
View Report Comments
There are three different types of comments that can be viewed on the Report Options page. There are three different types of comments that can be viewed on the Report Options page:
- Tooltip Option Comments: Comments can be added to each type of report option in your Reserves instance. These comments won't be immediately visible when you access the Report Options page, but tooltips will be added to the page to identify where these comments can be viewed. Hover your cursor over the tooltip icon () to view it.
- Comment Report Options: Comment report options can also be set up. These comments will be visible as soon as you open any report that the option has been assigned to.
- Report Comments: Each report can have its own comments as well. To view a report's comments, you will need to open the Option Settings popup. To open this popup, click on any of the comment icons (), or the white comment icon () below the report's options.
Click image to expand or minimize.
Click image to expand or minimize.
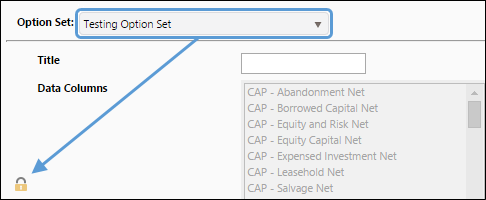
Activate an Option Set
Use option sets to quickly apply a predefined list of report options to the Report Options page. To enable an option set, follow these steps.
- Select the option set you wish to apply to your report using the Option Set drop-down menu. All of the report options that are defined in your option set will be locked.
- Any report options that are not defined in your option set will be available for editing. Set up your remaining report options, and then run your report.
Click image to expand or minimize.
Initialize a Report
Once you have set your report options, you can launch your report from the Report Options page. Use the hierarchy to select the objects to include in your report, and then click on the appropriate level of the hierarchy to initialize your report. More information on initializing reports can be found on The Report Page. When a report is launched from the Report Options page, the Report page will open automatically.
Create an Option Set
If you find yourself running a report with a specific option configuration (or running a group of reports with similar report options) on a consistent basis, you might consider creating an option set. Creating an option set will allow you to quickly set report options without having to modify each one individually. For more information see The Option Sets Page.
Setting up Report Comments
Users with permissions to access and use the Report Management part of Reserves can set up report comments.
- Tooltip Comments can be set up using The Option Definition Page.
- Comment Report Options can be set up using The Option Definition Page. Once they have been set up, assign them to your reports using The Report Manager Page.
- Report Comments can be set up using The Report Manager Page.